Did you ever find the answer to this? I have been trying to find the answer myself and falling short to.
Pulling & Camp Related:
/shd CampRadius ## - Sets the campradius to the value provided. If no value is provided it outputs the current value.
/shd Radius ## - This is your pull radius
/shd zRadius ## - This is your vertical pull radius
/shd CampOverlapBuffer - is the distance out of Camp to help group members (assigned puller excluded).
/shd DoCampfire - Turns on dropping a campfire
/shd CampfireDistance ## - Create a new campfire if campfire is more than this distance from camp.
/shd Ignore - adds your target to the pullignores.ini file in your release folder - will skip this mob in the pull routine.
/shd Unignore - removes your target or typed name from your pullignores.ini file in your release folder.
/shd ShowIgnore - Outputs a list of NPC's being ignored. May show the previous zone if you haven't gone into puller mode in your current zone.
/shd Groupwatch - 1|2|3|4 - Everyone, CC&Healer, Healer, Self
/shd HpMedStart # - percentage of health you want to start waiting at.
/shd HpMedEnd # - percentage of health you want to stop waiting at.
/shd ManaMedStart # - percentage of mana you want to start waiting at.
/shd ManaMedEnd # - percentage of mana you want to stop waiting at.
/shd EndMedStart # - percentage of endurance you want to start waiting at.
/shd EndMedEnd # - percentage of endurance you want to stop waiting at.
/shd LevelMin # - Where # is the lowest level NPC you want to pull.
/shd LevelMax # - Where # is the maximum level NPC you want to pull.
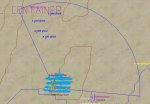
/shd PullArc # - Sets an arc in the direction of your camp heading to the degress provided. Shows the Arc on the map displaying that area.
/shd GoToCamp - runs back to your camp (like if you were in sictank mode)