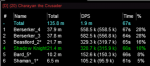
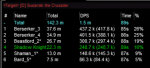
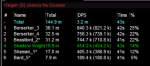
The crew I use for this is SK, Cler, Shm, Rog, Enc, Mage. The Cleric and Shaman use cwtn plugins, but everyone else on kissassist. T3 CoV gear. Cleric has battlemode on and shaman is DPS stance.
I use the same strat as Sic in terms of turning burns off until Dragon #3, but I do use some swarm pet mini burns with SK and mage on the 2nd one to ensure I don't get a drake add until the 3rd.
I use conditions on my kissassist toons to disable burns in my DPS section for Charayan & Susarra. These are the conditions I have that cover this mission and the sleepers one for all my burns under the DPS section. Maybe not the most efficient, but it works perfectly for me:
Code:
i.e. DPS1=Improved Twincast|100|Cond4

Cond4=(${Target.Named} &&  ${Cond[5]} && ${Cond[6]} && ${Cond[7]} && ${Cond[8]} && ${Cond[9]} && ${Cond[10]})
Cond5=!${Target.DisplayName.Equal[Cargalia]}
Cond6=!${Target.DisplayName.Equal[Honvar]}
Cond7=!${Target.DisplayName.Equal[Sivar]}
Cond8=!${Target.DisplayName.Equal[Melalafen]}
Cond9=!${Target.DisplayName.Equal[Charayan the Crusader]}
Cond10=!${Target.DisplayName.Equal[Susarrak the Crusader]}
In the DPS section of my kissassist toons, I have my mage and enchanter refresh shield of destiny on fade and the enchanter refreshes all the good spell/dot runes in combat if they fade. I find that keeping these runes up together with 2 healers prevents any of my crew from dying and I rarely have anyone go down on this mission even though my DPS isn't amazing.
Code:
DPS2=Deviser's Auspice|98|cond1
DPS3=Shield of Destiny|99|cond2
DPS4=Deviser's Unity|97|Cond3

Cond1=!${Me.Buff[Deviser's Auspice].ID}
Cond2=!${Me.Buff[Shield of Destiny].ID}
Cond3=!${Me.Buff[Polycascading Rune].ID}