After watching the Video guide a couple of times I'm busy configuring MQ according to the shown instructions. In the second video, titled "AutoLogin: Multiple EverQuest Character Login for Multiboxing" some the details vary significantly from what I encounter. Perhaps this is because I installed the full version of MQ from Github before installing very vanilla? Anyway, to try and help others who might encounter the same issues I thought I'd detail what mine looks like and the steps I had to take to configure and Auto-Login Group.
- When you Right-Click the MQ button you cannot Right-Click "Profiles" in order to create a new Auto-Login profile.
- Instead Right-CLick the MQ button and then click "Open Config", which is under the "AutoLogin" sub section.
- From inside the Config dialog (which may open on a secondary monitor) first configure all of your EverQuest Accounts.
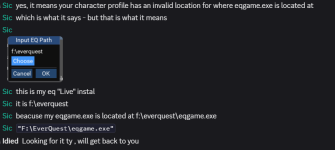
- Be warned that when you configure your EQ Install path you'll need to terminate it with a "\" or you'll get an error. In my case the path is "S:\Daybreak\Installed Games\EverQuest"
- If you simply browse to your EQ folder and try to select it you'll receive an error. I resolved this by browsing back to S:\Daybreak\Installed Games, then from there selecting the folder "EverQuest" to have it populate the visible box, and then manually appending a "\" to it in that visible box.
- After that MQ will be able to correctly locate EQGAME.EXE
- In order to populate all your available characters on all your accounts simply Right-Click on the created account you wish to populate and select "Launch Client & Login"
- Once MQ has launched EQ and logged in select the server your characters are on and open it.
- You'll notice a MQ dialog in the top right referring to "AutoLogin Status"
- For good measure I click on the "Select Character" button, then browse to my EQ Server, and make sure that my characters populate into the auto-generated list.
- Once your Characters have auto-populated you can shutdown the EQ client.
- Repeat these steps for each EQ account you have.
- Returning to the MQ "Open Config" dialog and browsing "Characters" should now show you all your available characters, on all your accounts, on all servers you have browsed.
- Now you're ready to create your AutoLogin Profile! In order to do so:-
- In the left pane of the Dialog click "Profiles", under the "AutoLogin" heading.
- Click "Add Group" in the right hand side of the dialog. Assign a meaningful name to the "Profile Group Name" Field.
- Verify the Path to the EQ installation you wish to use.
- Click "OK"
- You'll be returned to MacroQuest / AutoLogin / Profiles Config dialog with an empty list of Characters.
- Populate the right hand side of the Profiles dialog by clicking "Add Profile", which is in the lower right side pane of the dialog.
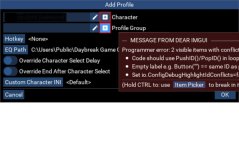
- This will open a "Add Profile" dialog.
- Click inside the "Character" box to see a dropdown list of your characters.
- Please note that this list does not include the account under which the character exists, so it's up to you to keep track of this detail.
- Beware of assigning two characters from the same account to a single AutoLogin Profile as this won't work, obviously.
- There are additional fields in the "Add Profile" dialog which you can investigate, but are outside the scope of this post.
- Repeat for all the characters you wish to include in the AutoLogin Profile.
- You're done!
- Repeat as needed to create additional AutoLogin Profiles.
Now when you right-click "MQ" on your taskbar and scroll up to "Profiles" it will populate with the AutoLogin Profiles you've created. Select the one you want and then "Launch All Starred". All the specified accounts and characters will login - almost like magic!
Please note that at this point your characters will all be logged in, but will not be in a group.