• You've discovered RedGuides, an EverQuest multi-boxing and scripting community 🧙‍♀️⚙️. We want you to play several EQ characters at once, come join us and say hello! 👋

  • A TLP without truebox has thawed (Very Vanilla ready)
    Frostreaver

Guide - Raid Boxing Strategies - Boxing Old Raids (1 Viewer)

nookiecookie

Chicken Licken
Joined
Oct 15, 2010
RedCents
4,121¢
I am going to share what I am doing with my 2 groups: War, Pal. Clr, Clr, Ber, Rog, Shm, Mag, Wiz, Enc, Brd and Dru and the strategies I use to do the events. For the War, Clr, Shm, Ber and Rog - I use CWTN plugins. For Pal, I only with Mq2heals and tab over to taunt. For the others, I use entropy. The group is mostly group CoV ore gear with a a few raid weapons and gear. Only one toon is full raid gear and it is a caster. They are max AA but I do not think it is necessary to win this event.

The first event is Raid Expedition: The Madness of King Tormax. The reason to do this Raid. There are two reasons to do this raid. The first is to get spell runes for spells/discs that have not been updated. You can see a list here: Spells and Discs Not upgraded with ToV/COV. The second is to get a guild trophy that provides +1% chance to twincast and+20 hInt and hWis: Trophy of Tormax. The final reason is to get a useless click nuke: Baelfire Gem.

The start of event is by dialogue with Noble Helssen. Going through the dialogue, will cause King Tormax to aggro. For this event, you need to offtank King Tormax and not kill him. I use my Pal to do this by equipping a no dmg item in primary and shield. I do not bash or use mq2melee plugin. There is no dmg shield on Pal and I drop clicky DMG shields like Jann illusion, familiars from CoV and ToV, and the clicky DMG shield from back items. He is leashed to the area but there is a cubby close by that you can pull him into. If KT dies, the event resets.

To win the event, you need to destroy "a crystal of fear" that is attackable. The good thing is that the boxes do assist on it when its HP goes below the assist value. You take the crystal down to 80%, it will then lock and push you away. At this time, Dain Frostweaver IV and 4 coldain figments spawn. You kill these 5 mobs and you can attack the crystal again. It is possible that Dain will banish people but this did not happen to me as the DPS was sufficient to kill them quickly.

You DPS the crystal down to 50% and then Lord Yelinak spawns. There are some emote but they did not trouble me.

Once Lord Yelinak is dead, you attack the crystal is attackable again, you take it to 13%. At 13%, it lock and Dain and 4 figments and Lord Yelinak spawn. You need to kill them and the crystal is attackable once they dead. You then just DPS the crystal down for the W.

The hardest thing is not killing King Tormax.

I will post more strategies and raids that I do with my groups.
 
Thx a lot Nookiecookie for the infos. Gonna work on these old raids soon :)
 
Awesome info! Thank you very much! Looking forward to see more Raid Strats posted. That is one area I've been wanting to dive into more :)
 
The next event is Raid Expedition: Grelleth, Her Majesty the Queen. The reason to do this Raid. There are two reasons to do this raid. The first is to get spell runes for spells/discs that have not been updated. You can see a list here: Spells and Discs Not upgraded with ToV/COV. The second is to get a guild trophy: Trophy of Grelleth. This Trophy will provide: +5 Archery, +50 Spell Damage, and +20 Heroic Dexterity

This is an easy raid that is all about managing the adds as they come. I use my Pal to tank the big pig Grelleth and my War is the Raid MA that the toons follow to support.

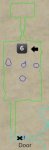
I pull Grelleth to the tunnel. Grelleth is at the 6 and pull her to the door in the tunnel at the X.

On activation, Grelleth will come with 4 adds, kill the adds. Then at 98%, Turo spawns along with 4 adds. Kill them. At 87%, two named spawn - Lelri and Lelro. Kill them. At 82%, Wuran spans with 4 adds, kill them. At 72%, Zurel spans with 4 adds, killthem. At 62%, Kotul pops, as you kill him adds pop - 92% Turo's Remains, Lelri`s Remains" and "Lelro`s Remains" at 82%, Wuran`s Remains" at 72% and Zurel`s Remains" at 62% , kill him and the adds. From 52% and on, there is a 90 second emote about switching tanks. I did not bother with this emote. She will continue to spawn adds - 4 adds at 39%, 36% eight rats, 31% 4 adds, 26% 4 adds and 21% 4 adds. I just burned her down and then killed the adds. The adds after 52% will not necessarily agro while fighting by the door. The named adds and their adds will agro the raid by the door.

There are several achievements with this raid:

1. Never Back Down: there are 4 npcs that if they live through the event give you an achievement. Protect your expedition allies without telling them to back down or leave at any point.
2. Regular Charmer: Send 4 palace guards and at least 6 oashim to their death as charmed pet
3. Flying a Kite: After Grelleth has powered up, do not slay her swinetor or undead reinforcements until she is dead.


Getting the achievements allows you to be able to purchase: Grelleth's Royal Seal which add a 575 hp proc with a stun up to level 105 to your weapons.
 

Attachments

  • Grelleth pull.jpg
    Grelleth pull.jpg
    13.2 KB · Views: 40
The next event is Raid Expedition: Grelleth, Her Majesty the Queen. The reason to do this Raid. There are two reasons to do this raid. The first is to get spell runes for spells/discs that have not been updated. You can see a list here: Spells and Discs Not upgraded with ToV/COV. The second is to get a guild trophy: Trophy of Grelleth. This Trophy will provide: +5 Archery, +50 Spell Damage, and +20 Heroic Dexterity

This is an easy raid that is all about managing the adds as they come. I use my Pal to tank the big pig Grelleth and my War is the Raid MA that the toons follow to support.

I pull Grelleth to the tunnel. Grelleth is at the 6 and pull her to the door in the tunnel at the X.

On activation, Grelleth will come with 4 adds, kill the adds. Then at 98%, Turo spawns along with 4 adds. Kill them. At 87%, two named spawn - Lelri and Lelro. Kill them. At 82%, Wuran spans with 4 adds, kill them. At 72%, Zurel spans with 4 adds, killthem. At 62%, Kotul pops, as you kill him adds pop - 92% Turo's Remains, Lelri`s Remains" and "Lelro`s Remains" at 82%, Wuran`s Remains" at 72% and Zurel`s Remains" at 62% , kill him and the adds. From 52% and on, there is a 90 second emote about switching tanks. I did not bother with this emote. She will continue to spawn adds - 4 adds at 39%, 36% eight rats, 31% 4 adds, 26% 4 adds and 21% 4 adds. I just burned her down and then killed the adds. The adds after 52% will not necessarily agro while fighting by the door. The named adds and their adds will agro the raid by the door.

There are several achievements with this raid:

1. Never Back Down: there are 4 npcs that if they live through the event give you an achievement. Protect your expedition allies without telling them to back down or leave at any point.
2. Regular Charmer: Send 4 palace guards and at least 6 oashim to their death as charmed pet
3. Flying a Kite: After Grelleth has powered up, do not slay her swinetor or undead reinforcements until she is dead.


Getting the achievements allows you to be able to purchase: Grelleth's Royal Seal which add a 575 hp proc with a stun up to level 105 to your weapons.
How can I solve Regular Charmer achievements? enchanter make charm to 1palace guard and guard kill 6 oashim? I don't understand what this achievement was.
 
Could i try it with one group of level 115 including enchanter? if can Which method should I try?
I have not tried this so this is thinking off the top of my head.

You get palace guards at 100%. Try tanking with no damage and have other toons do nothing except enchanter who will charm and send charmed mobs to fight. Take HP mob you charm before you charm but be careful not to kill. Hopefully, the Queen's AE will kill charmed mob and then you move onto next one to charm. You need to charm all 4 palace guards and have them die to get the achievement so be careful of DMG shields and riposte and the like.

You get the rats during the Lelri and Lelro fight. Do the same thing as with the palace guards. You need to charm at least 6 rats and kill them. They have less HP than the guards so be careful in taking their HP down before charming but you get more rats at 36% as well to charm.
 
The Next Raid - COTF: Raid Expedition: The Doomscale Horde

This is a simple raid. It is about keeping Commander Galenth, Lieutenant Rolth, Sergeant Teclisin and Guard Vraymon alive in the event. In the event, you will have five waves of mobs and then the named: Deathmaster Sarenth will spawn to be killed.

You can heal the 4 you are to keep alive but I just ignore them and deal with the waves of mobs. I do recommend giving each an HP buff. It has to be the single cast of the buff as group buffs will not land on them. The waves are on timers but you should kill them within the timer unless your DPS is not high.

I just position the toons in front of the npcs you keep alive to get agro first.

The achievements are easy to get:
Doomslayer: Kill all the Doomscale Cultists in each wave before the next wave attacks
Deathless Deathmaster: Do not allow anyone in your raid to die while Deathmaster Sarenth is alive
The Savior of Qeynos: Defeat the Doomscale Cultists without allowing any Qeynos Guards to die.
 
The Next Raid - COTF: Raid Expedition: The Doomscale Horde

This is a simple raid. It is about keeping Commander Galenth, Lieutenant Rolth, Sergeant Teclisin and Guard Vraymon alive in the event. In the event, you will have five waves of mobs and then the named: Deathmaster Sarenth will spawn to be killed.

You can heal the 4 you are to keep alive but I just ignore them and deal with the waves of mobs. I do recommend giving each an HP buff. It has to be the single cast of the buff as group buffs will not land on them. The waves are on timers but you should kill them within the timer unless your DPS is not high.

I just position the toons in front of the npcs you keep alive to get agro first.

The achievements are easy to get:
Doomslayer: Kill all the Doomscale Cultists in each wave before the next wave attacks
Deathless Deathmaster: Do not allow anyone in your raid to die while Deathmaster Sarenth is alive
The Savior of Qeynos: Defeat the Doomscale Cultists without allowing any Qeynos Guards to die.

1. I've found that you reduce the chance of a random mob getting to Commander Galenth if you actually position right smack in the middle of the friendly NPCs. That way everything rushes straight to one spot where AE agro is easy to accomplish. If you're even just a bit ahead of the friendlies bad mobs can scoot by while you're dealing with the rest of the horde and all of a sudden it resets because Galenth died.

2. At the very end when the Deathmaster spawns, I recommend grabbing it and pulling it as tightly into the nook in the stone rock formation just behind the friendly mobs. That guy does a fling/knockback that will throw your toons over the wall surrounding the event and they will NOT be able to get back in. A few times where that happened to me it took me FOOOOOOOOOOOOOREVER to kill him wailing on him solo with my SK or between my SK and my wizzy. It was terrible... so just save yourself the trouble and make sure you get a lev on everyone, tuck into that nook as tightly as possible (shrink), and use your "move to me" key often.

Another thing to watch out for is Nav will sometimes take you REALLY far out of the way to the west just to move you a few units eastward. To get around that I use a "move to" command instead of using nav.
 
I have not tried this so this is thinking off the top of my head.

You get palace guards at 100%. Try tanking with no damage and have other toons do nothing except enchanter who will charm and send charmed mobs to fight. Take HP mob you charm before you charm but be careful not to kill. Hopefully, the Queen's AE will kill charmed mob and then you move onto next one to charm. You need to charm all 4 palace guards and have them die to get the achievement so be careful of DMG shields and riposte and the like.

You get the rats during the Lelri and Lelro fight. Do the same thing as with the palace guards. You need to charm at least 6 rats and kill them. They have less HP than the guards so be careful in taking their HP down before charming but you get more rats at 36% as well to charm.
Thank you for your detailed information.
 
Thx for the detailled informations about this raid. I'll give it a try soon.
 
Next Raid: Saving Jacyll

For this raid, I send my druid up to the drum room and leave him there. He will hail frislo and then nuke the glass wall to start the raid. He will click the drum as he can. There is an achievement if one person clicks the drum 5 times: Drum Solo. I have not achieved this because the raid is down before I can click a 4th time. Once a person clicks the drum, you will not be able to click the drum for 2 minutes. To do the achievement, slow your DPS to allow for 5 clicks by one person.

In this raid, you stay in the middle of the main room and the adds will agro you. There are three waves in this fight. The first wave is 1 named and 6 adds. The next wave is 1 named and 6 adds. I recommend killing the adds first then named. For the second wave, the adds do have a single target silence which can be annoying.

The final wave is 1x "General Vaxa" + 1x "Lieutenant Drix" + 1x "Lieutenant Zizzix" + 1x "Lieutenant Vyzik". You get 6 adds at 75%, 50% and 25% of General Vaxa health.

The final wave is where you can get the other two achievements: Spelling Bee and Honey Don't. For Spelling Bee, you need to kill the 3 Lieutenants in order: Drix, Vyzik and Zizzix. For Honey Don't, you need to kill the reinforcements before killing the General. I recommend you kill the Lieutenants before DPSing the General.
 
Next Raid: The Defense of Lendiniara

For this fight, set-up in the middle of the island to defend Lendiniara. There are knockbacks from the mobs and if you knocked off island, you will miss an achievement: (Not) Into the Pit. Make sure to have toons return to camp to try to stay in centre of the island.

There are 4 waves. Wave 1 is Guard Vraymon. He is easy. Next wave is Guard Teclisin. He is easy but has an annoying effect of burning prison which has a chain nuke and roots the players.

Wave 3 is Lieutenant Rolth. He comes with 4 adds. They come every 2 minutes. You want to slow DPS here to get achievement: Outlast, Outfight! to kill at least 15 adds before killing last named Commander Galenth.

Wave 4 is single named Commander Galenth. Straight forward fight.
 
Oh this is a nice thread. I will have to sticky this one and invite a friend or to to run these old ones. This will be nice to see since ive missed alot over the years and can work on the ACH for these events. I like the trophys and such too!
 
Next Raid: The Defense of Lendiniara

For this fight, set-up in the middle of the island to defend Lendiniara. There are knockbacks from the mobs and if you knocked off island, you will miss an achievement: (Not) Into the Pit. Make sure to have toons return to camp to try to stay in centre of the island.

There are 4 waves. Wave 1 is Guard Vraymon. He is easy. Next wave is Guard Teclisin. He is easy but has an annoying effect of burning prison which has a chain nuke and roots the players.

Wave 3 is Lieutenant Rolth. He comes with 4 adds. They come every 2 minutes. You want to slow DPS here to get achievement: Outlast, Outfight! to kill at least 15 adds before killing last named Commander Galenth.

Wave 4 is single named Commander Galenth. Straight forward fight.

Another couple tips for this raid:

1. Before you start this event, run up top and pre-kill the 4 guards.

2. During Guard Teclisin, the burning prisons do NOT appear on the extended target window. However, they show up on the map. It can get a little hairy trying to right-click them from the map. I found creating a hotkey to "/target burning" on my tank (driving toon). Then all other toons set to assist me. So, when the burning prison appears, hit the hotkey and the team will quickly burn it down and then can continue with killing Guard Teclisin.
 
Anyone have a Strat to defeat? From Bixie Warfront

Raid Expedition: Pelzia's Plot​

This is going to be a difficult raid to box due to its mechanics. You have to keep the red color and yellow color mobs separate because the mob gives debuff that will cause a DT if you hit by the rain of the other color. You need to keep the colored mobs separate from each other .
 

Illdaera's Vengeance​

This is a raid in VoA expansion. It is a bit of a pain due to mechanics but easy. I have my tank alone engage Avatar of Steel at the start of the event while I farm shards.

I have 3 toons collect Energetic Steel Shard that you loot from a golem splinter. Each toon needs at minimum 6 each. The shards are used to move 2 carts and the tower. To spawn the golem splinter, you need to hit the Avatar of Steel with bolt guns on the "neck" ledges. There are 2 guns on each side, you will probably have to switch guns at time because they break and need to be repaired but will be repaired during the fight. You fire the gun just by clicking on the gun. I generally spawn 21 or so golem splinters to give each toon 7 shards.

This generally allows me to take the mob to 75 and HP locks. You need to move the 2 carts to him, you do this by jumping on the cart and clicking the shards. On 3rd shard toon, /tar spell and then /nav target to get to the catapult that will fling you on the tower. Click the shards to move the tower and once it is in position, it will drop water on the Avatar. The carts unlock HP and the water makes the Avatar damageable. Then just kill Avatar and adds, you can still use the gun to do damage.

The reason to do this Raid. There are two reasons to do this raid. The first is to get spell runes for spells/discs that have not been updated. You can see a list here: Spells and Discs Not upgraded with ToV/COV. The second is to get a guild trophy:

Empowered Trophy of Hardened Steel


There was a typo in the mq2events, fixed it.​

Raid Expedition: Ritual of Terror​

This is pita raid. You need to run a dude with the proper glyph up the temple after a certain mob dies. There are 4 temples, they have to run up at the same time. If you don't, it can bug and be stuck in a loop where it just spams adds and you cant kill the final 4 mobs.

Summary

- Kill lizardmen until they despawn.
- Kill Kerchak the gorilla.
- Kill the seven mini named while fending off adds.
- Loot glyphs from the mini named, paying attention to which temple lizardman emotes when looting.
- After Grime (the seventh mini named) dies, glyph holders run up to their respective temple lizardmen to activate them.
- Kill the four temple lizardmen.

To do this, I use Mq2events and Mq2Nav waypoints.

[CODE title="Mq2Events"][Terror Glyph]
trigger="#*#Templar of Terror says, 'So, you want to take me on?#*#"
command=/multiline ; /boxr pause; /rsay I have Terror; /pause 10; /nav wp terror;

[Dread Glyph]
trigger="#*#Diviner of Dread says, 'I foresaw that you#*#"
command=/multiline ; /boxr pause; /rsay I have Dread; /pause 10; /nav wp dread;

[Fear Glyph]
trigger="#*#Cenobite of Fear says, 'You shall not live long enough#*#"
command=/multiline ; /boxr pause; /rsay I have Fear; /pause 10; /nav wp Fear;

[Anxiety Glyph]
trigger="#*#Archon of Anxiety says, 'I do not fear that trinket#*#"
command=/multiline ; /boxr pause; /rsay I have Anxiety; /pause 10; /nav wp anxiety; [/CODE]

[CODE title="Mq2Nav Waypoints"][feerrott2]
Fear=322.487 -836.223 -5.99799
terror=255.644 -603.087 39.904
anxiety=133.162 -833.804 -5.99799
dread=-175.669 -1008.45 -6.35597
fear2=389.049 -836.155 31.6115
dread2=-174.002 -1068.22 31.7769
anxiety2=74.7658 -833.499 31.6115
terror2=307.196 -604.091 77.15 [/CODE]

I assign glyph to a toon and look for the rsay portion, then assign loot to next assigned toon.

I set-up a hot key to move then to nav wp2 once the trigger mob is dead.

[CODE title="Hotkey"]/dex Toon1 /nav wp XXXX
/dex Toon2 /nav wp XXXX
/dex Toon3 /nav wp XXXX
/dex Toon4 /nav wp XXXX[/CODE]

You will need to edit the hotkey to add the wp that the specific toon is assigned based on the glyph they looted.
 
Last edited:
House of Thule Tier 2 Raids

I will just group the 4 tier 2 Raids in one post.

The Grounds: The Roots of Evil
This is simple. I killed it no problem with no real mechanics. Might have trash to deal with.

Terror in the Dark​

- Set up the raid in the far east cavern. The biggest pain is moving zone since it water zone. The oozes will randomly port you if you touch it. If you have CotH, makes this easy. Although moving 5 of your six toons to east cave will work. You need to leave 1 toon at zi to do next step.
- Say "stop" to Mortimer to spawn the event.
- Kill the tentacle terrors and their 50% splits while killing off add spawns and not stepping over the oozes. My DPS killed it quick got one set of adds that despawned when tentacles dead.

The Librarian's Nightmare​

This was pita because if you kill the Librarian in phase 2, you reset the event. There are 4 phases.

Phase 1 - pick up books and click them to spawn mobs until you get Words of Opening. Hand The Butler the "Words of Opening": and say, 'Love is the consumption of self.' to butler. You then say prepared.

Phase 2: The Animated Books & Silence Aura
For the next 4 minutes, you kill book spawns and deal with a silence aura until you get this emote:

The butler's voice, frail and cracking, comes wafting weakly across the library, "Do what she wants... Read her books..."

Phase 3: Spawning the Stories & Keeping the Librarian Distracted
The silence aura is gone after the emote. You need to off-tank no dmg the librarian. Best to use someone who can heal and use spells to kill the pet add that spawns on occasion as you offtank the librarian. The librarian will randomly port around the zone while engaged and summon 6 people on her agro list.

Rest of raid deals with 3 stories you need to spawn. They appear in random order. One is a spider attack Miss Muffet, you kill spider. Another is Billy the piper and his rats, you kill billy and rats. The final is Dwarfs and Whitesoals, there are total of 8 mobs in this part. Clicking the pedestals can spawn ordinary books which are not part of the three stories. Once three stories are done, i.e. all mobs that need to be dead are dead, you can kill librarian.

Phase 4: Kill Librarian

In this phase pull the librarian close to the butler and take her down to 10% when the event moves into next phase where she is unkillable but it goes through a script about her wedding. Loot chest.

The Torches of Truth​

This is pita for the fight with Markus Jaevins. You have to get torches from the Spirit of Erud on 4 toons. Equip the torches and these 4 toons will be 50% hp for rest of the fight and reduced movement speed. The 4 torch bearers need to be next mob as you kill. For each mob, you need to go through a script from Spirit of Erud.

The first mob is Lanken Rjarn, he has bunch of skeletons in front and spawns 1 every minute. It easy. The second mob is easy too Ghanlin Skyfire. The third mob Markus Jaevins is pita. He moves so best to set up raid in spot where he pauses, you will notice the pause and you can dmg him while he in the pause spot but he will wander on. Do not follow because he moves faster then 4 torch bearers.

At the end of killing these mobs, you need to move torch bearers to the roof of the library. Talk to Spirit of Erud and spawn Terris Thule, you should be able to kill TT in one go but if not, he will depop and torch bearers will be ported to random spot and you need to get back to the library roof asap.
 
Sad Its Over GIF by Star Wars


Well, at least we can all be sad together.

Will have to think more to work it out to try and get into tower of rot raid.
 
House of Thule: Tier 3 Raids

The Force of Eternity​

This is a PITA raid. You need to divide the raid into 3 groups.

Summary from Allakhazam:
- Say "promise" to Sig to get the expedition.
- Split the raid into three: "magic", "body", and "brain".
- Everyone should zone into their assigned areas.
- When ready, trigger the three room events at the same time or as close together as possible.
- Simultaneously:
--- Kill Miragul`s Lich in the "body" room while fending off its Corpse Bomb adds.
--- Kill The Synarcana in the "magic" room while killing its mote adds based on color.
--- Kill mobs in the "brain" room.
------ Have a pure caster pick up the ground spawns from the mobs and use a research kit to create banes.
------ Bane to death the Expanding Evil ooze in the "brain" room.
- Re-gather outside Miragul's room.
- Fight Miragul Reformed to 80% while stepping in and out of the room to cure the DT counter.
- Balance Miragul`s Erratic Power, Miragul`s Broken Body, and Miragul`s Shattered Mind down to 50%.
- Kill Miragul Reformed while keeping the Dread Construct adds away (root and snare).

Miragul's Lich - this is straight melee put melee dps here, The Synarcana will do emtoes setting out what spells and weapons he will be weak too. I put my melee group (War, BRD, CLR, Shm, Ber) in the Lich room aka body. I put my caster group (Pal, Clr, Dru, Wiz, Mag) in The Synarcana in Magic. I put Rog, Enc in the Brain room. The mobs in the Brain room do not fight and you kill them to get the ground spawn. You use the ground spawns to combine in int research kit (confirmed that melee could not do the required combines). I use Mq2groundspawns on Enc to collect the items. I have 2 hotkeys: /ground active on and /ground active off. This allows me to collect items automatically and pause it to do the 5 combines needed.

[CODE title="Code for Mq2GroundSpawns Ini"][phylactery_raid]
ItemList=|book|letter|lost lord's promise|Unflinching Destruction|Generic (sm)|Peace Offering|Clear Ocean Quartz|crystal|Dungeon rot spores|lichen|Gift-wrapped toy|A Ripe Pumpkin|Fun Ball|
[/CODE]

- 1x "Spot of Bother" (combine: 1x Inkblot + 1x Wandering Thought)
- 3x "Shining Power" (combine: 1x Words of Power + 1x Gem of Power)
- 1x "Inspiring Power" (combine: 1x Insight to Power + 1x Inspiring Insight)
Those are the combines, you will get item to make spot of bother last from the killing mobs in brain room. You use the items you made on the 2 mobs left in the room in a particular order.

On the Expunged Evil, click (in order):

- Spot of Bother
- Lady's Favor (drop)
- Secret Password (drop)

On Miragul`s Mind, click (in order):

- Shining Power
- Shining Power
- Shining Power
- Inspiring Power

After you completed the 3 rooms, you click on the blue thing on top of the pedestal where you zone in to move to next phase.

For Phase 2, you fight Miragul Reformed until 80%. Then you fight 3 mobs which you have to keep within 4% of each other. For the balance phase, I use just my War and 1 1-hander weapon on the 3 mobs. I just alternate to keep the 3 mobs within 4% of each other. If you fail, this portion of the event will reset. The good thing is you only have to balance the 3 mobs to 50% and they despawn and Miragul Reformed reappears at 80% and you kill, i do reactivate everyone to fight at this time. One thing is you will get The Dread Constructs which are annoying mobs but I just burn named and kill these mobs afterwards since they do not despawn.
 
@nookiecookie any new raid strats to add for boxing old raid targets?
 

Arx Mentis Event #1: Defense of the City​

For this event, we have to deal with Captain Tila, her troops and the various tactics they employ. There are four troop formations. Troop formations consists of 10 warriors, 1 cleric and 1 wizard. Initially, one formation aggros us while the remainder are non-combative. Captain Tila becomes active if one formation is killed entirely, or more than half of all the soldiers are killed, or after six minutes elapses from troop formation. Once Tila is active, her soldiers break ranks and it's go time. She has various AEs including directional ones. Kill Tila and all mobs to win.

If Tita is left off aggro for 30 seconds, the event resets.

Event Trigger: Talk to Mayor Livio at the top of the steps and follow dialogue. You may need SoS Rogue to do the dialogue from behind the mayor.

Set-up
Put shaman pet by Tita at the top of the steps to aggro Tila when she activates. Put toons in one formation, set tank to tank mode and kill off formation.

Once formation is almost dead, move to another formation (remove tank mode from tank to sic tank mode to move) kill the next formation. Tila will aggro once one formation is dead or half the army is dead, bring pet back to group so tila stays aggoed.

Kill the next formation, killing 2 formations should get you achievement: The Center Holds: Defeat half of Tila's Army without breaking their formation. Kill all trash before killing Tila to get another achievement: Best for Last. Once 2 formations are dead the formations will no longer be rooted.

The final achievement: Slapstick is about getting 7 different people to second most hated on Tila to get hit by her "Burning Slap".
 
This is going to be a difficult raid to box due to its mechanics. You have to keep the red color and yellow color mobs separate because the mob gives debuff that will cause a DT if you hit by the rain of the other color. You need to keep the colored mobs separate from each other .
Anyone have a LEM for this by chance? I tried to box it last night and had some nasty chain DTing on my tank which eventually led to a wipe.
 
End of empire (ros) is a pretty easy raid to box, basically just tank and spank after you get the green guys down, probably the most recent raid I have one boxed, good for getting mangling rk3 for zerk
 
Fight fire is 2, maybe even 1 groupable now (TBL)
I did two group Fight Fire. I set-up in the middle of the island. Phase 1 is 3 waves of trash. You start it by saying destroy to a Jorpal. An Inferno Flare causes blindness but mezzable.

Phase 2 is 2 named mobs, I fight them separated from each other. During the fight, there are 2 trash that come and I just kill them when they come up.

Phase 3 is a single mob, just kill it.

Phase 4 is single mob and waves of 3 trash come, I have 1 group kill the named and other group kill trash and assist on named when no trash up.
 
Last edited:
I have tried General Reparm but hit a road block with the snails. The ae's are too much to splash heal and I am having difficulty in separating them to fight away from each other.

I do have a LEM for the bone burner for each tank to go and attack an individual one so that number of skellie adds can be reduced. It is working but needs improvement.

Any suggestions on the snails?
 
Guide - Raid Boxing Strategies - Boxing Old Raids

Users who are viewing this thread

Back
Top
Cart