



luclinjunkie
Seasoned veteran member
- Joined
- Jul 14, 2019
- RedCents
- 1,053¢
Going to review this for grammar and if it is easy to understand. Apologies I sometimes come back with revisions.
____
This is a quick review of how I setup for Darkness Howls. I do the mission in about 25-30 minutes.
Mission includes 5 phases (objectives):
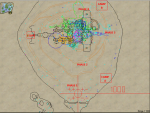
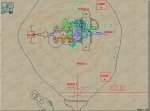
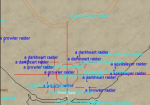
This screenshot will get you through the first four phases.
Move your group from START to CAMP A. This will be the start of PHASE 1: Kill 12 raiders.
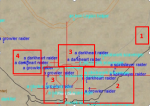
PHASE 1:
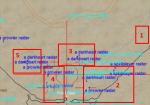
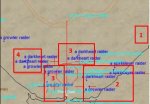
Move your group to CAMP A. This can be done in as little as one pull by pulling from Group #5 first and running it to your camp location, but typically am sipping my coffee and do it in 5 pulls. #1 is where you camp will be set up, roughly. Then pull each group thereafter.
Investment: 6 mins.
PHASE 2:
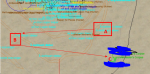
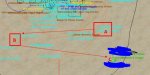
Keep your group at Camp A. I mount up. Once the climbers spawn I keep my distance from the mob ~150 yards and pull a mob at Point A. I then run to Point B and pull a mob, then move to Point C: Back to Camp. The mobs will socially gather each other. You will pull them all in this group.
I Shield Flash, Carapace, and Epic / work through the mobs.
Note if you get snared, I remove with Purity of Death. Not sure of equiv for non-SK?
Investment: 4 mins
PHASE 3:
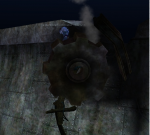
Run your puller near the 'gap' where the infiltrators come in. This is important to tag them as soon as they spawn / before they walk down the wall. You will pull all 11. This is also the riskiest pull. But, it is my preferred method. I Shield Flash, Deflection, BP / Bloooddrinkers, and Guardian Circle 3 through them. You have your group still at Camp A. Bring them with you, AE taunt and work them down.
Investment: 6 mins
PHASE 4:
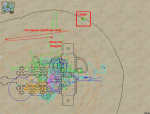
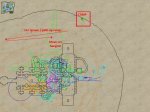
You're going to move your group past the Phase 3 / rubble and the two gnomes on the ground. The camp will be just south / east of the hanger. The orcs spawn and path up a ramp. I do this in two pulls. I pull 5 orcs as they ramp up and kill them, then I pull the remaining orcs in the hanger. These orcs do hit like trucks at times. I use mantle and, if it comes back up, flash. If you're taking too much damage pull in 3's instead.
Investment: 6 mins
PHASE 5:
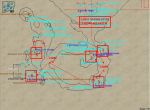
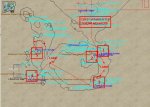
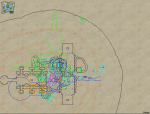
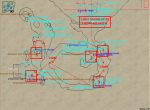
This is the last phase. It is the location down south. I run my crew to CAMP C. You pick up a howler and a scrubby orc on the way down. Next to you will be Pull #2. Camp C location is good for the pulls so they do not bug out pathing. I then do Pull #3. After, invis up and move to Camp D. This leaves two easy pulls #4 is a double pull, #5 is a single pull. Go loot chest. Should be about 25-30 mins at this point.
Investment: 6 mins.
____
This is a quick review of how I setup for Darkness Howls. I do the mission in about 25-30 minutes.
Mission includes 5 phases (objectives):
| Phase 1: Kill 12 raiders |
| Phase 2: Kill 8 climbers |
| Phase 3: Kill 10 infiltrators |
| Phase 4: Kill 10 orcs in the supply area |
| Phase 5: Kill 5 howlers |
This screenshot will get you through the first four phases.
Move your group from START to CAMP A. This will be the start of PHASE 1: Kill 12 raiders.
PHASE 1:
Move your group to CAMP A. This can be done in as little as one pull by pulling from Group #5 first and running it to your camp location, but typically am sipping my coffee and do it in 5 pulls. #1 is where you camp will be set up, roughly. Then pull each group thereafter.
Investment: 6 mins.
PHASE 2:
Keep your group at Camp A. I mount up. Once the climbers spawn I keep my distance from the mob ~150 yards and pull a mob at Point A. I then run to Point B and pull a mob, then move to Point C: Back to Camp. The mobs will socially gather each other. You will pull them all in this group.
I Shield Flash, Carapace, and Epic / work through the mobs.
Note if you get snared, I remove with Purity of Death. Not sure of equiv for non-SK?
Investment: 4 mins
PHASE 3:
Run your puller near the 'gap' where the infiltrators come in. This is important to tag them as soon as they spawn / before they walk down the wall. You will pull all 11. This is also the riskiest pull. But, it is my preferred method. I Shield Flash, Deflection, BP / Bloooddrinkers, and Guardian Circle 3 through them. You have your group still at Camp A. Bring them with you, AE taunt and work them down.
Investment: 6 mins
PHASE 4:
You're going to move your group past the Phase 3 / rubble and the two gnomes on the ground. The camp will be just south / east of the hanger. The orcs spawn and path up a ramp. I do this in two pulls. I pull 5 orcs as they ramp up and kill them, then I pull the remaining orcs in the hanger. These orcs do hit like trucks at times. I use mantle and, if it comes back up, flash. If you're taking too much damage pull in 3's instead.
Investment: 6 mins
PHASE 5:
This is the last phase. It is the location down south. I run my crew to CAMP C. You pick up a howler and a scrubby orc on the way down. Next to you will be Pull #2. Camp C location is good for the pulls so they do not bug out pathing. I then do Pull #3. After, invis up and move to Camp D. This leaves two easy pulls #4 is a double pull, #5 is a single pull. Go loot chest. Should be about 25-30 mins at this point.
Investment: 6 mins.
Attachments
-
 Picture #1.JPG83.6 KB · Views: 0
 -
 Picture #2 - Phase 1.JPG33.4 KB · Views: 0
 -
 Picture #3 - Phase 2.JPG34.4 KB · Views: 0
 -
 Picture #3 - Phase 3.JPG39.3 KB · Views: 0
 -
 Picture #4 - Phase 4.JPG62.4 KB · Views: 0
 -
 Picture #5 - Phase 5.JPG64.8 KB · Views: 0
 -
 1605146141129.png292.9 KB · Views: 0
 -
 1605146163923.png279.9 KB · Views: 3
 -
 1605146510900.png662 KB · Views: 0
 -
 1605146714390.png660 KB · Views: 0
Last edited: